> For the complete documentation index, see [llms.txt](https://docs.datacroft.de/llms.txt). Markdown versions of documentation pages are available by appending `.md` to page URLs; this page is available as [Markdown](https://docs.datacroft.de/main-functions/the-workspaces-tab.md).
# Workspaces (Projects)
## Summary
The "workspaces" tab gives you an overview over all (not only shared) workspaces, also called "projects" of your Adobe Analytics account. You can **filter, sort, and delete** **multiple Workspaces at once.** On the top right, you also see some useful **usage stats**!

## Workspace Usage Stats
The usage stats help you understand how active your users are currently, and which workspaces draw the most attention:

### Set how far back the Workspace Usage Stats should go?
By default, Workspace usage stats go 90 days back. If you want another time range, you can set it in the "config" tab in the "Other Settings" column by adding the following settings there:
* Settings Code: `workspace_views_days_back`
* Settings Value: `a value between 1 (min) and 400 (max)`

In the following, we refer to this time range as {n}.
### Total Workspace Usage Stats (top right)
The usage stats on the top right help show you the general activity of your organization's usage of Adobe Analytics:
* **Number of Workspaces:** If you are passing the 1'000's, it's usually time to do a cleanup. See next chapter.
* **Workspaces with >= 1 view in the last {n} days:** You have many Workspaces, but which of them actually get any attention at all?
* **Views last {n} days:** Views in the last {n} days for all your Workspaces. Monitor this to see how engaging your Adobe Analytics experience is.
* **Users with >=1 View last {n} days:** How many users have viewed at least 1 Workspace in the last {n} days? The all-important *"how many active users do we have?"* question
* **Sum Active schedules:** How many regularly scheduled email exports (e.g. PDF, CSV) does your organization have?
### Workspace Stats (in each row)
* **viewsLast{n}Days:** How many views did a Workspace get in the last 90 days?
* **usersLast{n}Days:** How many users viewed this Workspace at least once in the last 90 days?
* **activeScheduledJobs:** How many scheduled emails (e.g. regularly scheduled PDF exports) do exist currently for a Workspace?
## Rename Workspaces
You can rename Workspaces or change their descriptions in bulk. Simply start changing the text in the "name" or "description" columns, and you see the yellow "rename" column to the right showing an "x". The row also gets highlighted in yellow:
If you do not want to rename a workspace after all, just remove the "x" in the "rename" column. The yellow highlight disappears.
To apply the renamings, simply run **"Workspaces -> Rename Workspaces"**. Now wait for the status bar on top to finish.
The following video shows the Renaming feature in more detail:
{% embed url="" %}
If you **do not see the "rename" column**, simply recreate the Workspaces tab via "Other -> Recreate this tab" ([more on this](/main-functions/updating-the-layout.md)).
## Clean up Workspaces
The following is a guide how to use the workspaces tab as the first step of a typical **cleanup**. You will learn all the functions during the way.
### Video with all steps
{% embed url="" %}
Watch the video or follow the text guide below
{% endembed %}
### Step-by-Step Guide in Text Form
#### 1. Update the List
Cick on "Workspaces" -> "**Update Workspace List**" to pull in the up-to-date workspaces list. The **status bar** on the top shows you the progress. Usually this does not take longer than a minute.

#### 2. Understand the columns
The most important columns ones are explained below:
* **owner\_id:** The numeric user ID (unique to the Experience Cloud) of the owner of the Workspace
* **owner readable & owner email:** The owner of the Workspace. If you see "na" here, Personally Identifiable Information (PII) is disabled in your Component Manager. If you are authorized to do so, remove [the "no personal data" flag in the "config" tab](/what-data-is-processed-and-stored-where.md#personal-data).
* **id:** The unique ID of a Workspace project
* **name:** The title
* **description:** The description (accessible e.g. when you save a Project in Analytics)
* **rsid:** Report Suite ID where the Workspace was **created.** Can be different from the Report Suites that are used in this Workspace's panels.
* **companyTemplate:** Is this Workspace a [Custom Template](https://experienceleague.adobe.com/docs/analytics/analyze/analysis-workspace/build-workspace-project/starter-projects.html?lang=en)?
* **type:** Is it a normal "project" (Workspace) or a "Mobile Scorecard"?
* **accessLevel:** The access level of the technical user for the API access that you created during the [initialization of the Component Manager](/getting-started-with-the-component-manager.md#2-create-a-jwt-api-2-0-token-and-adobe-analytics-admin-account). Usually irrelevant, but if you see mostly "duplicate" here, it means your technical user does not have the necessary rights (e.g. to edit all workspaces).
* **tags:** Tags your users assigned to this Workspace
* **shares:** With whom is this Workspace shared
* **approved:** Is the Workspace "approved" by Admins?
* **siteTitle:** The "Site Title" of the Report Suite this Workspace was created in
* **modified:** When was the Workspace last modified?
* **created:** When was the Workspace created?
* **viewsLast90Days:** How many views did a Workspace get in the last 90 days?
* **usersLast90Days:** How many users viewed this Workspace at least once in the last 90 days?
* **activeScheduledJobs:** How many scheduled emails (e.g. regularly scheduled PDF exports) do exist currently for a Workspace?
* **link:** A link directly to the Workspace. Note that this link may not work if you have a multi-client Adobe account (switch to the client in the Experience Cloud's navigation bar first, then try again).
* **delete:** In the coloured "delete" column, you can mark Workspaces you want to delete with "x" and then delete them via "Workspaces -> Delete Workspaces".
### 3. Filter for unused Workspaces ("candidates for deletion")
1. Mark the row with the column headers
2. Click the Google Sheets filter icon twice. First, to remove the filters, then to add them again. This ensures all Workspaces (also the new ones you may have just pulled by updating the list) are part of the filtered range. You can verify that all rows are included by going into the "id" column and pressing CTRL + SHIFT + DOWN ARROW.
3. Click on the Filter symbols in the column headers to do the following selections:
1. activeScheduledJobs = 0
2. viewsLast90Days = 0
3. companyTemplate = FALSE
4. modified => “Date is before” -> “exact date” -> your date in format “2020–07–01”, e.g. select only Workspaces that were not modified in the last 12 months
This is just the most general approach to cleaning up. You can of course filter for anything else that makes sense in your case. An example would be filtering for...
* **unshared workspaces** (shares = "blank") of
* **owner names** that have left the organization (including the default "Unknown User" that Adobe Analytics assigns if a user is deleted and his Workspace is not reassigned)
### 4. Copy the filtered list to another Google Sheet and give your users some time to object to the deletion
1. Select the filtered Workspaces list by clicking anywhere into the filtered range and then pressing CTRL + A (Select All)
2. Copy it into the Clipboard by pressing CTRL + C
3. Create a new empty GoogleSheet and call it "Workspace Deletion Candidates"
4. Paste the list from the Clipboard into this new sheet. This way only the filtered Workspaces (=only the deletion candidates) will be pasted.
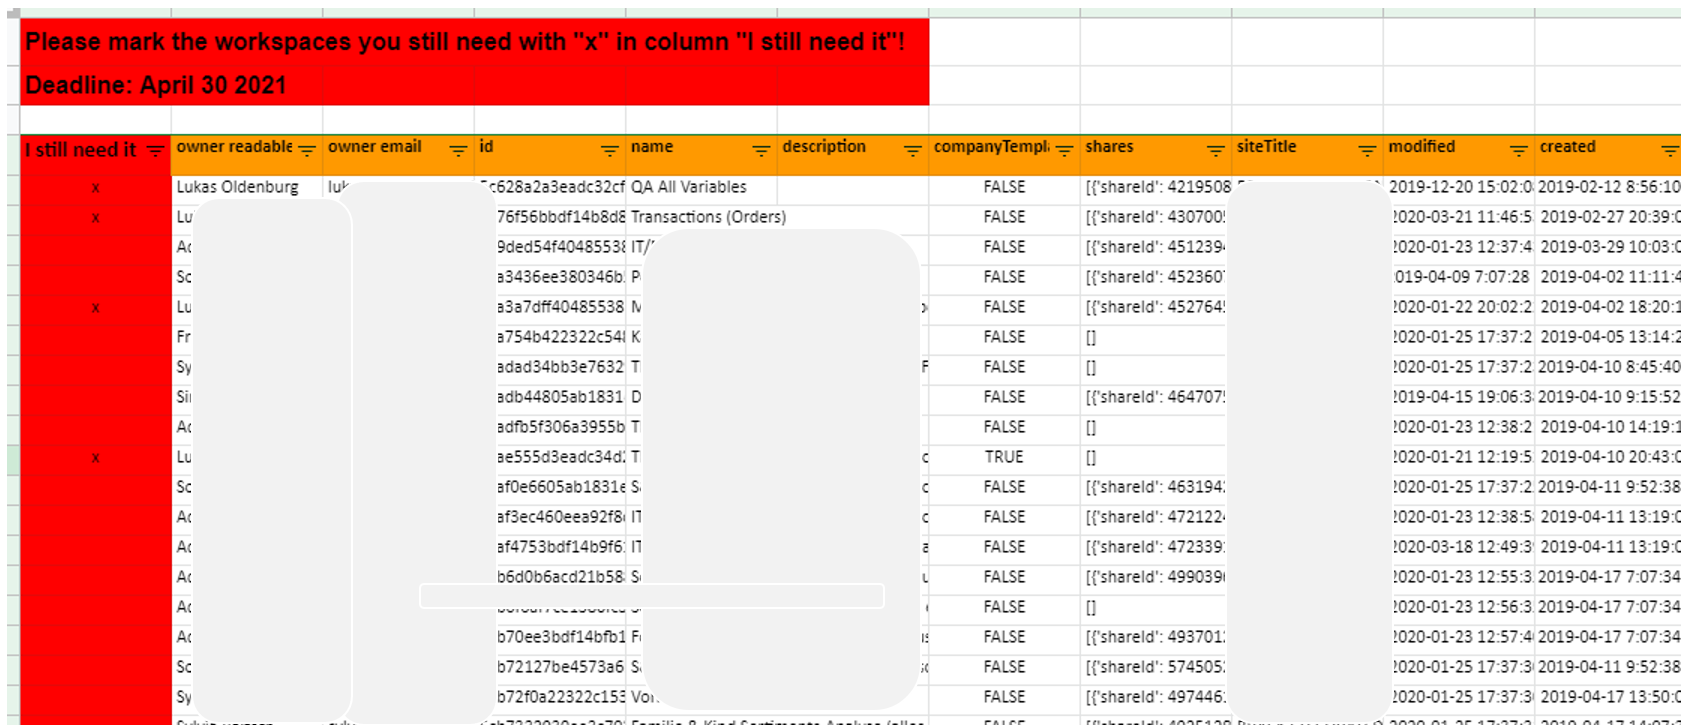
5. Add a column for your users where they can mark the workspaces they still need.
6. Add some text above that tells owners until when they can object to the deletion.
7. Send an email to the owners of the workspaces (you can get a list of all unique email addresses by running the [UNIQUE function ](https://support.google.com/docs/answer/3093198?hl=en)on the owner email” column, in a free column to the right. Then simply copy-paste them into your email recipient field).\
\
In the email to the owners, send the link to the sheet, explain the benefits (cleaner, faster Analytics with less interpretation errors, misunderstandings and frustration) and explain that they need to mark all Workspaces they still need with “x”.
### 5. Proceed with the Deletion
Now that your users have marked the Workspaces they still need with "x", we can copy the *other* Workspaces back to the "workspaces" tab (or use a smart lookup formula to get the same result). If your Google Sheets skills are a bit rusty, this is the easiest way to to do it:
1. Filter the sheet for the owners by blanks in the "I still need it" column
2. Put an "x" into the "delete" column for all those Workspaces (because those are the ones you can delete)
3. Go to the "workspaces" tab of the Component Manager, remove the filter and delete all the content below the column headers between column "id" and the "delete" column so that you end up with an empty list:

4\. Copy-paste the filtered list from the sheet for the owners from the "id" column to the "delete" column. Now, the "workspaces" tab should contain only the workspaces to delete with an "x" in the "delete" column:

5\. Now go to the menu and run "Workspaces" -> "Delete Workspaces".
6\. After completion you will see a success message in the Status bar. Also check out the **deletion log in the update\_log tab** to verify that the deletions were successful.